|
Plugins/Filters
Toadies - Blur'em!...
Flaming Pear - Flexify
2
Graphics Plus ---Cross Shadow
VDL_Adrenaline Snowflakes
Alien Skin -Eye Candy 5: Nature - Icicles
The
tube(S) come from Franie Margot
The tubes in this tutorial are adapted by me.
If you are using your own tubes, reduce them as you see fit.
Is there a tube of yours? If so, please let me know so I can put your name
on it.
I'd
like to send a big, heartfelt thank you to all the amazing tube makers out
there for creating these incredible tubes. Please don't remove the
watermark.
The
copyright belongs to the original artist, and I'd love to see credit given
to them.
Thank
you!
*****
Make your
images and tubes the same size.
Change the blend mode/opacity in your layers palette.
****
Step 1
Choose a light color for the foreground and a dark color for the background of your tube
Gerrie has chosen the following colors
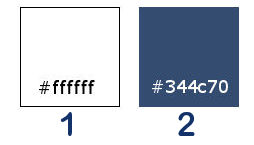
Material Properties: Set your foreground color to
#ffffff --- your background color to #344c70
Step 2
File - Open a new transparent image of this size :1000x800 pixels
Step 3
Selections-Select All
Step
4
Activate
your background
image(Achtergrond 1 A)
Edit-Copy
Step
5
Activate your work
Edit-Paste
into selection
Step
6
Selections-
Deselect All
Step
7
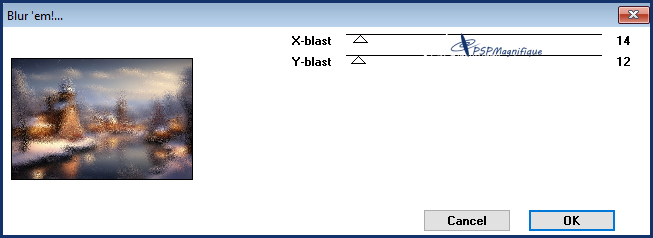
Effects - Plugins Toadies - Blur'em!...with
these settings
Step 8
Layers - Duplicate
Step 9
Image - Resize - to 90% - Resize
all layers-NOT Checked
Step 10
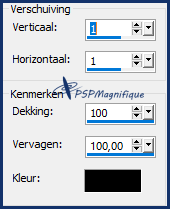
Effects- 3D- Effects- Drop
Shadow with these settings-Color
Black
Step 11
Open the tube
-femme longue 2
Edit-Copy.
Step
12
Activate
your work -Edit - Paste as new
layer
Step
13
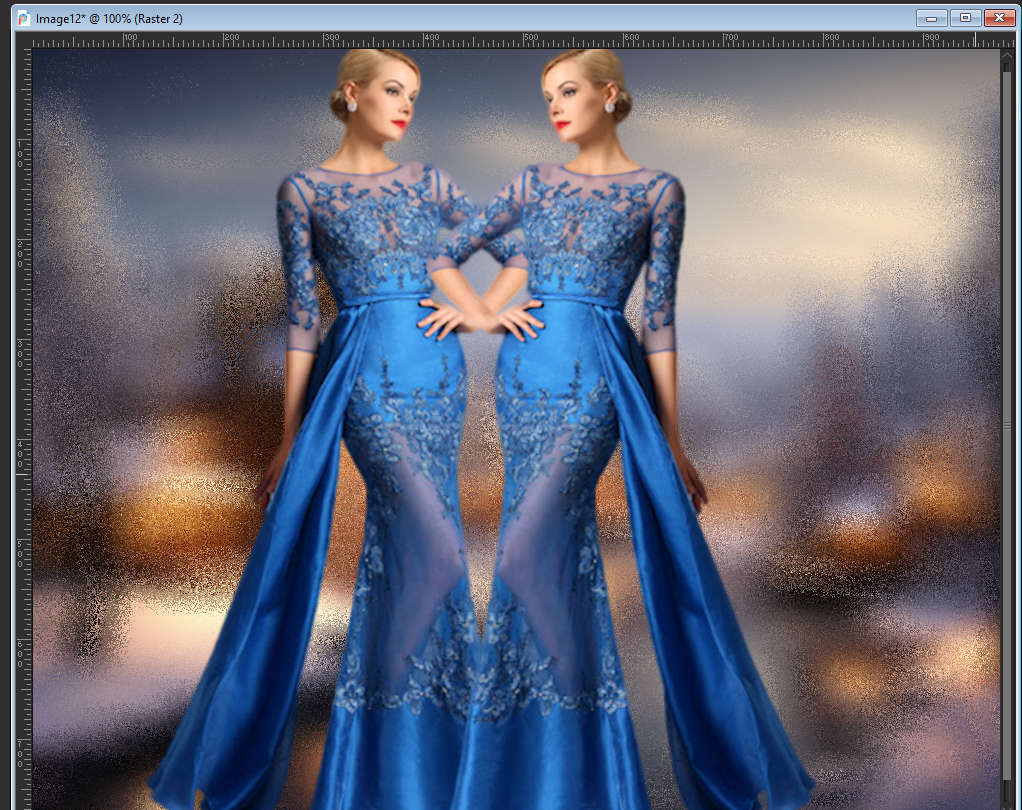
Use your own tube and duplicate.
Place it as shown (narrow tube).
Look at the ruler parameters.
All tubes are different.
Step
14
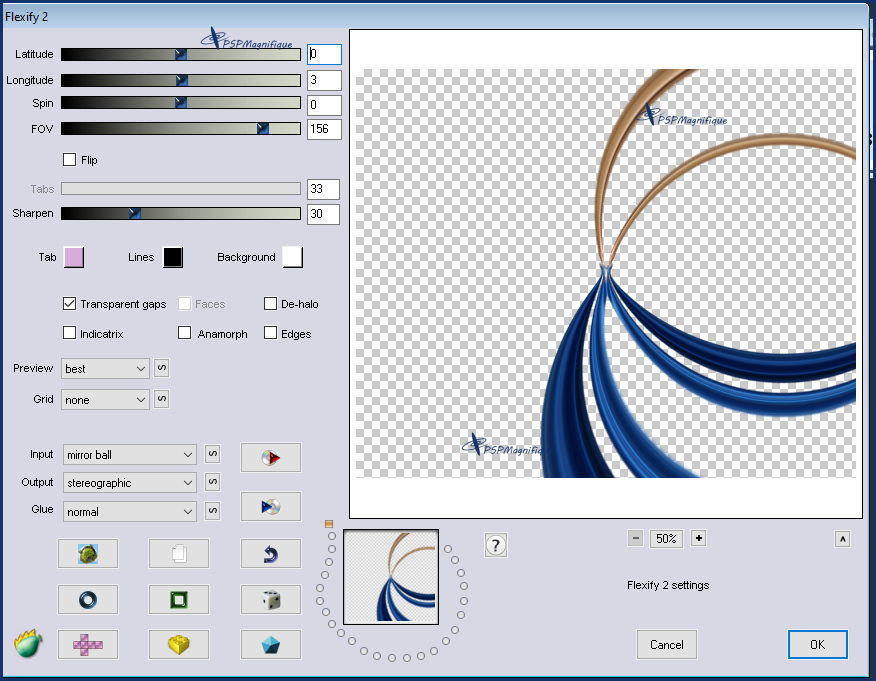
Effects- Plugins- Flaming Pear-Flexify 2
Click on the red arrow>>select
my file preset Flexify 2 settings
q2q
can be used in any folder of
your choice by clicking on it.
Open it will be
ok in your filter
Or set the
settings manually
Step
15
Layers - Duplicate
Step
16
Image - Mirror - Mirror
vertical ( Image - Flip in older
versions of PSP)
Step
17
Image - Mirror - Mirror
Horizontal (Image - Mirror in
older versions of PSP)
Step
18
Layers- Merge- Merge Down
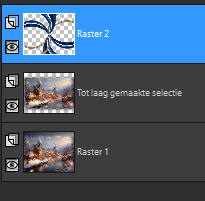
The
result
Step 19
Activate Raster 2 in the layer
palette
Step 20
Activate your Magic Wand –
Tolerance at 20 and Feather at 0

Step 21
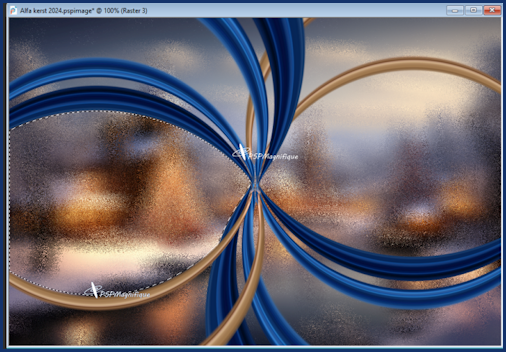
Click in the left circle
with your magic wand
Step 22
Layers-New Raster Layer
Step
23
Activate
your background
image(Achtergrond 1 A)
Edit-Copy
Step
24
Activate your work
Edit-Paste
into selection
Step
25
Selections-
Deselect All
Step 26
Activate Raster 2 in the layers
palette
Step
27
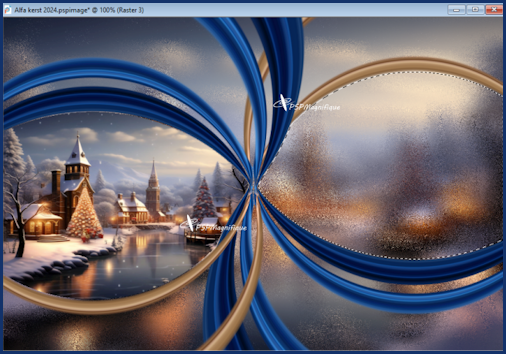
Click
with your magic wand in the
right side of the circle
Step 28
Layers-New Raster Layer
Step
29
Activate
your background image (is
still in memory)
Step 30
Activate your work
Edit-Paste
into selection
Step
31
Selections-
Deselect All
Step
32
Activate
the layer above
Step
33
Layers- Merge- Merge Down
Step
34
And
close this layer(close the eye)
Step 35
Layers-palette - activate
the layer underneath
Step 36
Activate your Magic Wand –
Tolerance at 20 and Feather at 0

Step 37
Click in both circles with
the wand
Step 38
Layers-New Raster Layer
Step 39
Selections -Invert
Step 40
Effects-
Plugins- Alien Skin -Eye Candy 5: Nature
- Icicles -with these
settings- Color
1

Step
41
Selections- Deselect All
Step
42
Activate the top layer in
the layer palette=Raster 4
Open this layer
Step
43
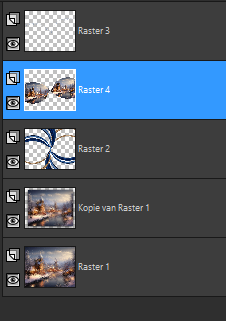
Layers-Arrange- Move Down
This is what the
layers palette looks like
Step
44
Activate the top of the
layers palette
Step 45
Open the tube
- robe_longue20_franiemargot
Edit-Copy.
Step
46
Activate
your work -Edit - Paste as new
layer
Step
47
Layers - Duplicate
Step
48
Activate the layer underneath
Step
49
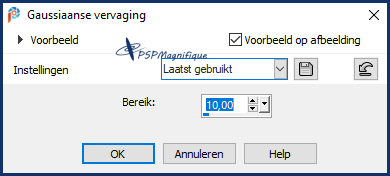
Adjust-Blur- Gaussian
Blur-Radius 10%
Step
50
Layers-Properties-Set the Blend
Mode to " Overlay "
Step 51
Activate the top of the layers
palette
Step
52
Activate your text tube
- Happy Christmas
Edit-Copy.
Step
53
Activate
your work -Edit - Paste as new
layer
Step
54
Put in a place of your choice
Step
55
Layers -Duplicate
Step
56
Layers- Merge- Merge Down
This is what the layers palette
looks like now

Step 57
Activate the top of the layers
palette
Step 58
Layers-New Raster Layer
Step 59
Selections -Select All
Step 60
Activate Flood Fill Tool
 -Fill
the selection with the
background color
2 -Fill
the selection with the
background color
2
Step 61
Selections- Modify-Contract 10 pixels

Step 62
Click delete on the keyboard
Step 63
Selections - Invert
Step
64
Effects- Plugins– Graphic - Cross Shadow
using the default settings

Step
65
Edit - Repeat Graphic
- Cross Shadow
Step 66
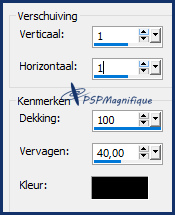
Effects- 3D- Effects- Drop
Shadow with these settings-Color
Black
Step 67
Selections- Deselect All.
Step 68
Layers-New Raster Layer
Add your watermark
Step 69
Layer Palette - Close Raster 4
and the layer of the 2 circles
Step 70
Activate Raster 2 in the layers
palette
Step 71
Activate your Magic Wand –
Tolerance at 20 and Feather at 0

Step 72
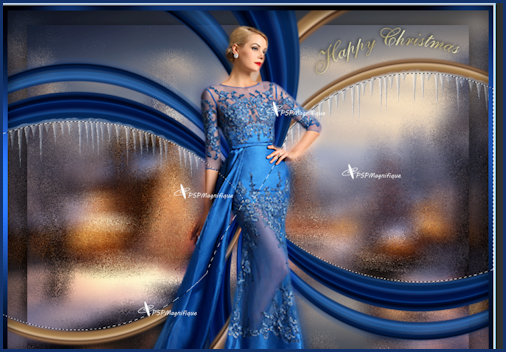
Click with your magic wand
in the 2 circles
Step 73
Remove the lock from Raster
4-
and activate this layer
Step 74
Layers-New Raster Layer
Step
75
Effects -
Plugins - VDL Adrenaline - Snowflakes
- use the settings below
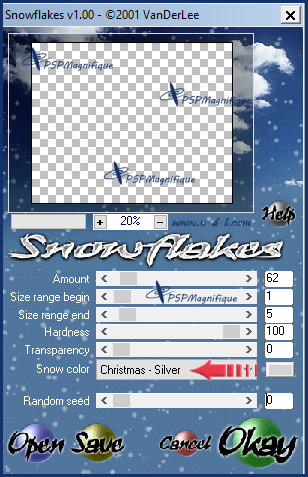
Step
76
Selections- Deselect All.
Step 77
Edit - Copy special - Copy merged.
Step 78
Open your animation shop
Step 79
Edit - Paste - As a new
animation.
Step 80
Go back to paint shop click 2
times on
 Undo
arrow Undo
arrow
Repeat-Effects-Plugins- Van der Lee – Snowflakes,
set Random Seed to 40
and OKAY.
Step 81
Selections- Deselect All.
Step 82
Edit - Copy special - Copy merged .
Step 83
In your Animation Shop-Edit -
Paste after current frame
Step 84
Go back to paint shop click 2
times on
 Undo
arrow Undo
arrow
Repeat-Effects-Plugins-Van der Lee - Snowflakes,
set Random Seed to 80
and OKAY.
Step 85
Selections- Deselect All.
Step 86
Edit - Copy special - Copy
merged .
Step 87
In your Animation Shop-Edit
-Paste after current frame
Step 88
Edit - Select all
Step 89
Animation / Frame properties /
change the given number to one
that suits you better :
- The bigger the number is the
slower the animation will be.
- I have chosen speed 10
See what works
best for you
Step 90
Animation / Resize animation by
800 pixels
Step 91
File - save as gif file
Give your crea a name and Save
it
Click 4 times on next and finish
Did you create a lesson and want to show it off?
Please send me an EMAIL
pspmagnifique@gmail.com
Size for the
gallery maximum 800 PX
If you mail me your version, you can see it here,
Version of Marion
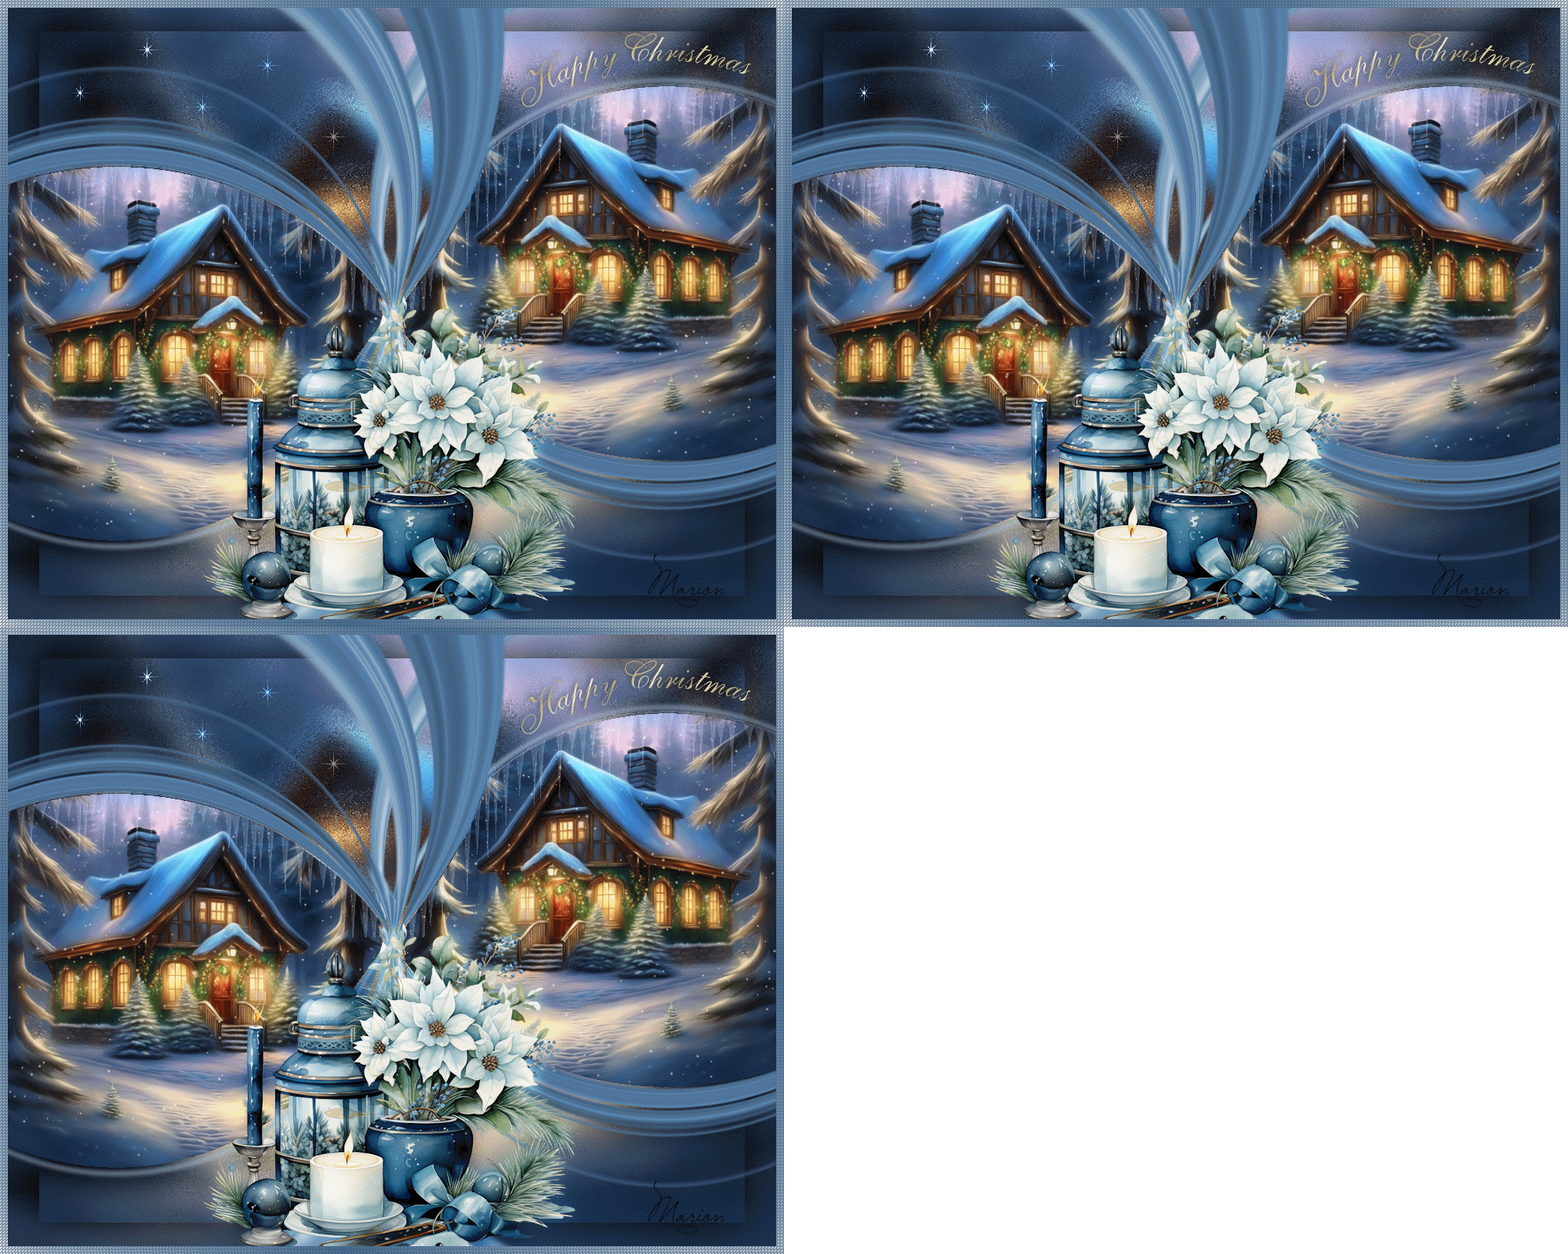
This lesson was
written by Gerrie on July 12,
2024
This Lesson is and remains owned
and copyrighted by Gerrie.
They may not be copied or
distributed without my written
permission.
All my lessons are my own, so
any similarity is purely
coincidental.
All of my lessons are registered
with TWI

Thema Index Home Websitedesign:
© Gerrie 2011
|