This lesson was created in PSP 18, but it can also be made in other versions.
Translated into French and Italian by Pinuccia.
Marion translated the lesson into English
Thanks to the translators
Click on the flag to see the translation.


Gerrie has used the following filters
Medhi
Mura's Meister Copies
Unlimited2.0 - Factory Gallery U
L&K landksiteofwonders - Mayra
Alienskin - Xenofex2.0 -Constellation
Permissions tubes
Here
Materials
Tube from claudiaviza-mujer.
If there is a tube of yours, please let me know so I can add your name.
Thanks to all the tube makers and creators for creating these wonderful tubes.
Leave the watermark on the tube intact.
Copyright belongs to the original artist.
Give credit to the creator.
****
If you use your own images and/or tubes, please make them the same size!
You can adjust the blend mode or opacity in your layer palette, whatever works best for you.
Feel free to adjust this as needed.
****
Step 1
Open your tubes and resize them.
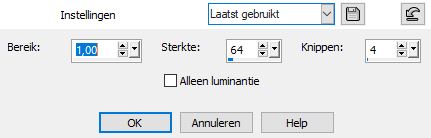
Adjust - Sharpness - Unsharp mask 1-64-4.
Step 2
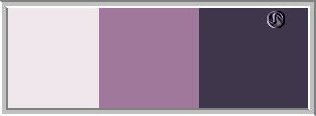
In your tube, find a light color for the foreground and a dark color for the background.
Gerrie's color choice:
Set your Foreground color to color #
f0e7ec
- Set your Background color to color #
3f364b
Additional color #a0789b
Do you have a different color?
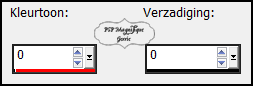
Adjust - Hue and Saturation- Colorize
Step 3
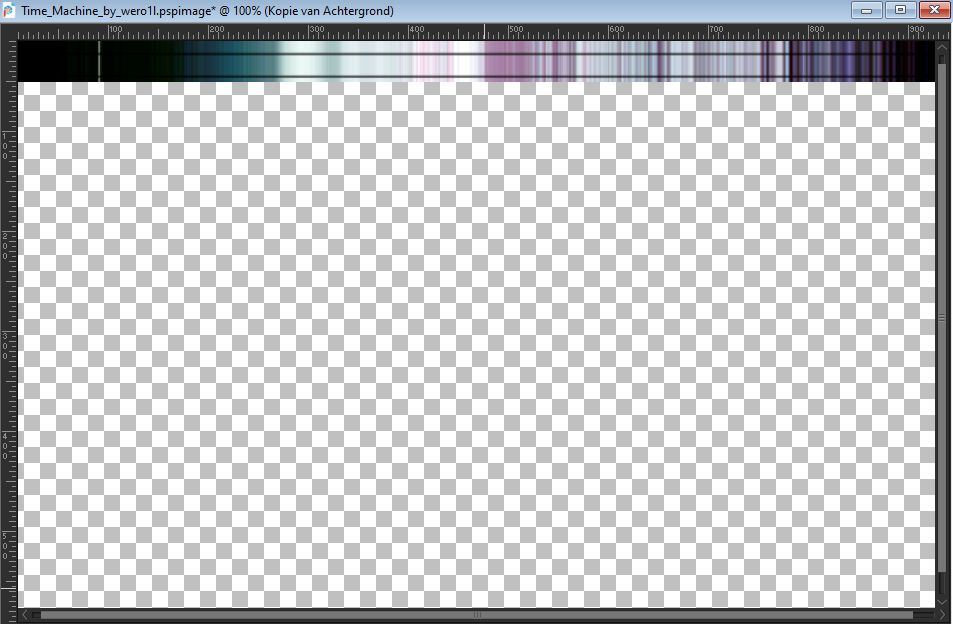
Activate the Background Image - Time Machine by wero1l - On this we work
Step 4
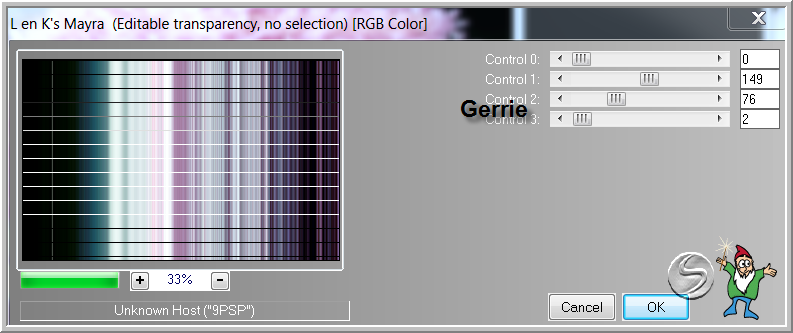
Effects - Plugins - L&K Siteofwonders - Mayra using the default settings (0- 149-
76 2)
Step 5
Layers - Duplicate
Step 6
View -
Rulers
Pick Tool: (K) on your keyboard -
Activate the bottom center node -
and push up to 2.5 cm
*
as shown in the example below
Step 7
Slide the bar down as shown in the example below
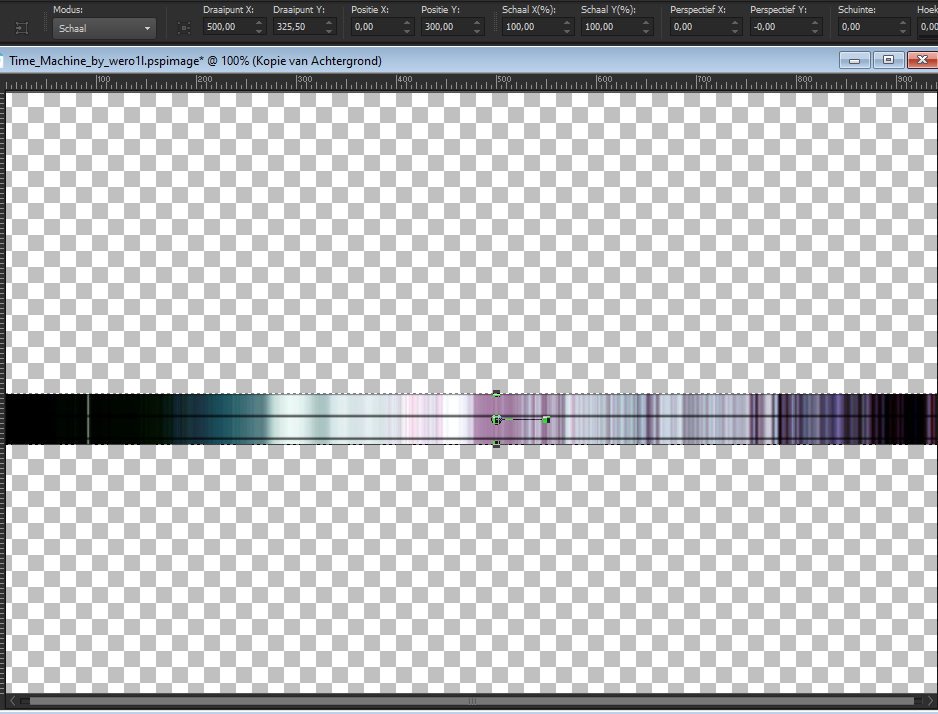
Click on image rulers and the ruler is gone
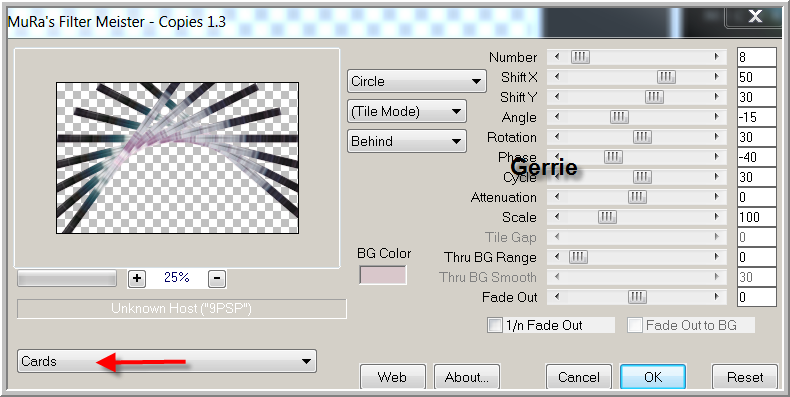
Step 8
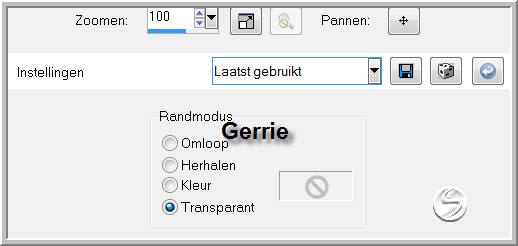
Effects - Plugins - MuRa's Meister - Copies - use the settings below
Step 9
Pick Tool: (K) on your keyboard -Enter these parameters on the toolbar
Position X 0,00- Position Y -70
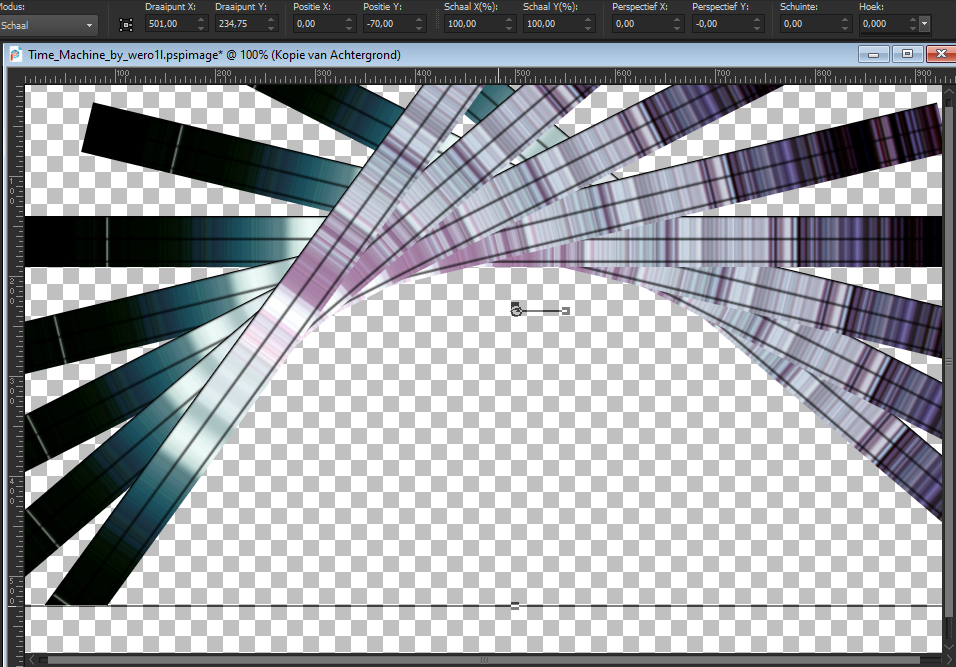
Step 10
Adjust - Sharpness - Unsharp mask with these settings: 1-64-4.
Step 11
Layer palette - Activate the Background layer
Step 12
Layers - Duplicate
In the layers palette - Activate the middle layer
Step 13
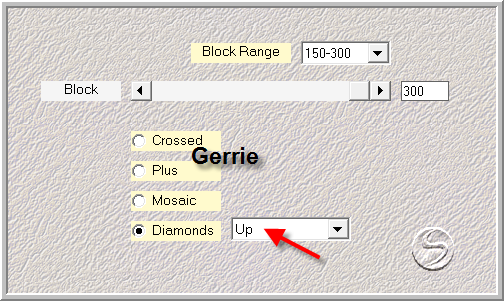
Effects - Plugins - Medhi - Sorting Tiles - use the settings below
Step 14
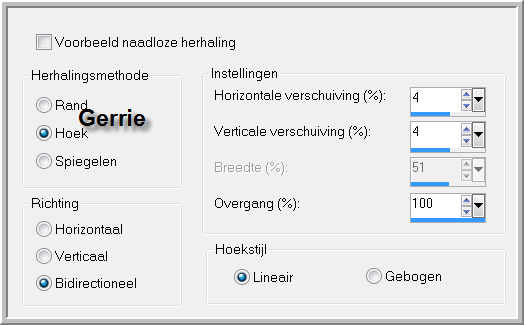
Effects - Image Effects - Seamless Tiling use the settings below
Step 15
Effects - Geometric Effects - Spherize- using the default settings

Step 16
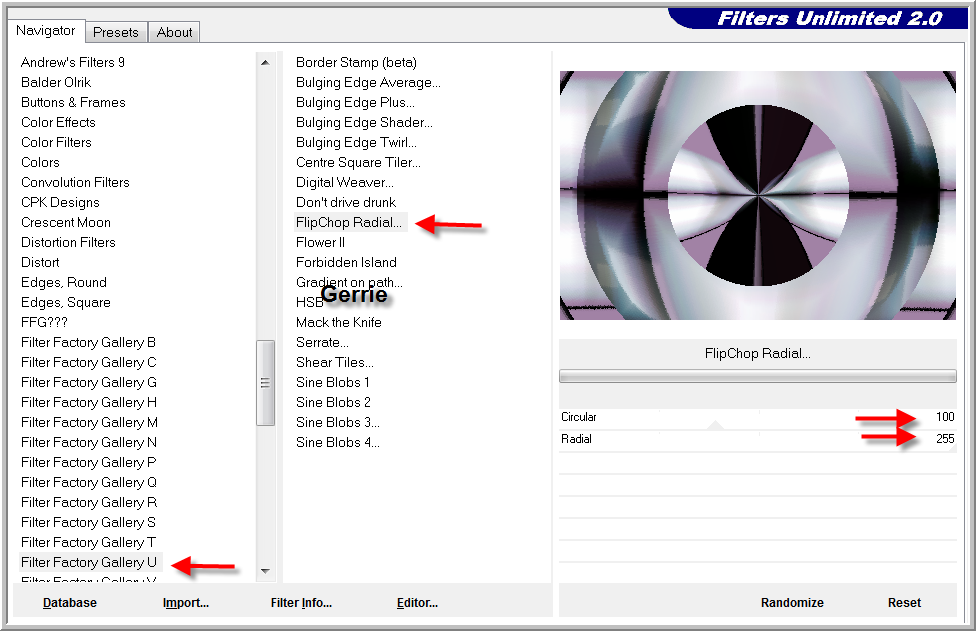
Effects - Plugins- Filter in Unlimited2.0 - Factory Gallery U - FlipChop Radial use the settings below
Step 17
Activate your Selection Tool - Selection Type Circle - And draw a circle in the middle circle

The circle has to be removed - Delete on your keyboard
Step 18
Selections - Select none
Step 19
Layers palet - Activate the Background Layer( Bottom layer )
Step 20
Layers - Duplicate
Step 21
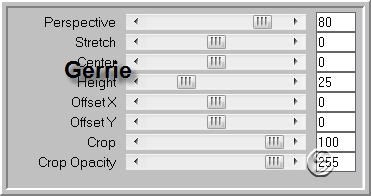
Effects - Plugins - MuRa's Meister - Perspective
Tiling -
use the settings below
Step 22
Layers - Arrange - Bring to Top
*
The Result

Step 23
Activate the background layer ( Bottom layer )
Step 24
Layers - Duplicate
Step 25
Effects - Geometric Effects - Circle - Transparent checked
Step 26
Edit - Copy
Step 27
Activate your work - Edit - Paste as new layer
Step 28
Layers - Arrange - Bring to Top
Step 29
Image - Resize 28% - Resize all layers not checked
Place on the left bottom- See finished image
Step 30
Adjust - Sharpness - Unsharp mask: 1-64-4.
Step 31
Layers - Duplicate
Step 32
Image -Mirror -Mirror Horizontal (Image - Mirror in older versions of PSP).
Put it in the right place ( see finished image)
Step 33
Lock these 2 layers with the Balls for a moment
Step 34
Activate Raster 1 in the layers palette
Layers - Merge - Merge Visible
Step 35
Open the 2 layers of the balls again
Step 36
In the layers palette - Activate the left ball layer
Step 37
Effects - Reflection - Effects - Feedback -Opacity 100
Intensity 60 - Horizontal Offset -70 !!
Vertical Offset -89

Step 38
Put exactly in the middle as shown in the example below
Step 39
Effects - 3D - Effects - Drop shadow of your choice.
Step 40
In the layers palette - Activate your right ball layer
Step 41
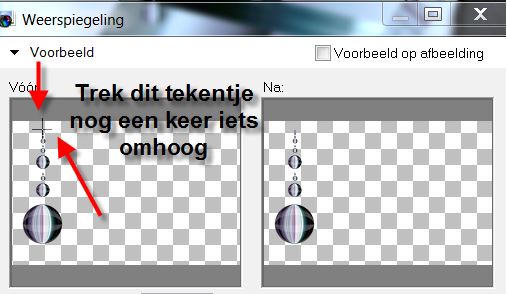
Effects - Reflection Effects -Feedback use the settings below
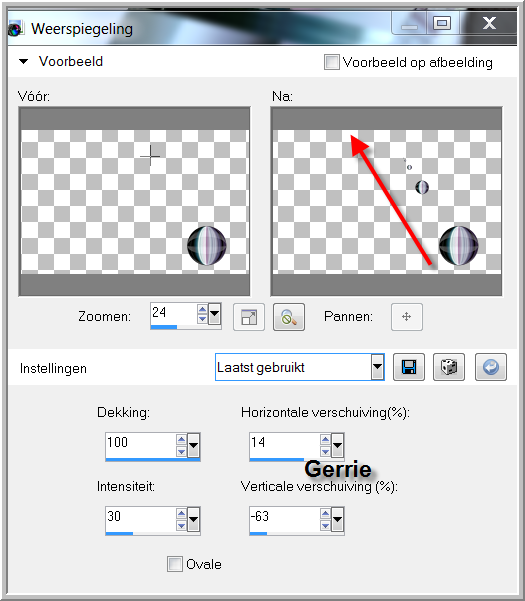
Place the ball exactly as shown in my example
Step 42
Effects - 3D - Effects - Drop shadow of your choice.
Step 43
Activate the upper layer of balls
Step 44
Layers - Merge - Merge Down (Single layer with the balls)
Step 45
Activate the top of the layers palette
Step 45
Activate your main tube - tubeclaudiaviza-mujer2440
Edit - Copy
Activate your work
Edit - Paste as new layer
Put the tube in the middle of your work - See finished image
Image - Resize 85% - Resize all layers not checked
Effects - 3D - Effects - Drop shadow of your choice.
Step 46
Layers - New raster layer
Add your watermark
Step 47
Activate the middle layer with the layer of the balls
Step 48
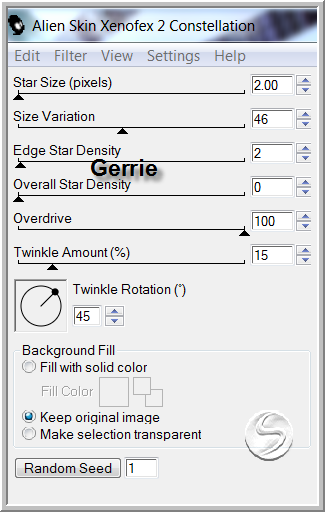
Effects - Plugins-Alienskin Xenofex 2- Constellation - use the settings below
Step 50
Edit - Copy Special - Copy Merged.
Step 51
Open Animatieshop
Step 52
Edit - Paste - As new animation.
Step 53
Go back to Paint Shop
Click 2 times on Undo arrow and repeat the filter Alienskin - Xenofex2 -Constellation
Click once on Random Seed .
and OK
Step 54
Selections - Select none
Step 55
Edit - Copy Special - Copy Merged.
Step 56
Back to your Animation Shop
Edit - Paste - After active frame
Step 57
Go back to Paint Shop
Click 2 times on Undo arrow and repeat the filter Alienskin - Xenofex 2. - Constellation
Click once on Random Seed .
And OK
Step 58
Selections - Select none
Step 59
Edit - Copy Special - Copy Merged.
Step 60
Back to your animation shop
Edit - Paste - After -Active frame
Step 61
For the Gallery
Animation - Resize Animation - to 800 pixels.
Step 62
Save as gif
Give your crea a name and Save it.
Did you create a lesson and want to show it off?
Please send me an email
pspmagnifique@gmail.com
Size for the gallery is a maximum of 800 pixels.
This lesson was written by Gerrie on April 3, 2013
This lesson is and remains the property of Gerrie.
It is forbidden to copy or distribute it without my written permission.
All my lessons are my own .... so any similarity is purely coincidental.
All my lessons are registered with TWI
Proud member of

Tag Index
Home