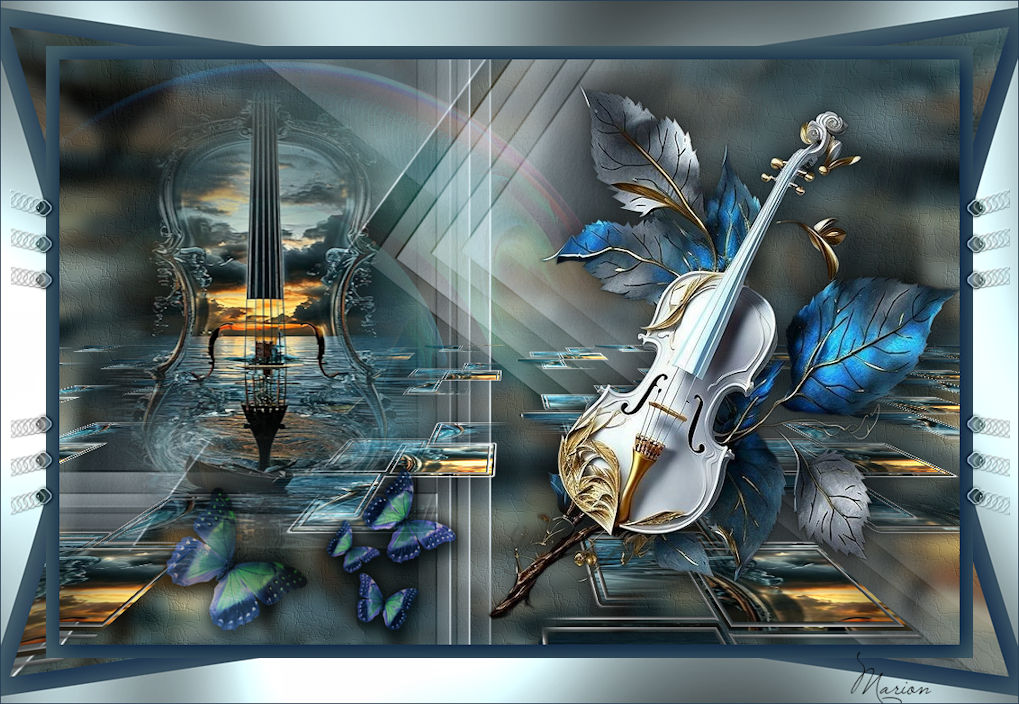
This lesson was created in PSP12, but it can also be made in other versions.
The colors can vary greatly depending on the PSP you are using. . .
Marion translated the lesson into English
Pinuccia translated this lesson into French
Thanks to the translators
Click on the flag to see the translation


Plugins - Reneegraphisme
Here
Place the selections in the selections folder of your psp files
Mask - Open your mask in psp and minimize
Gerrie has used the following filters
Richard Rosenmann
*
MuRa's Meister -Perspective Tiling
*
Greg's Factory Output Vol.II - Poolshadow.
User Defined Filter - Emboss-3
- Place in the presets folder
Materials
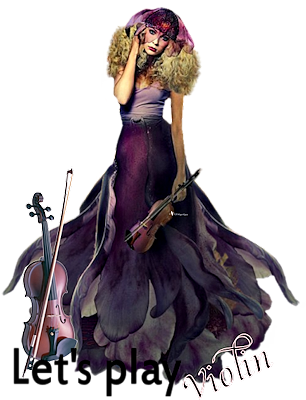
The tube is from, Gini.
If there is a tube of yours, please let me know so I can add your name.
Thanks to all the tube makers and creators for creating these wonderful tubes.
Leave the watermark on the tube intact.
Copyright belongs to the original artist.
Give credit to the creator.
NOTE:
If you use your own images and/or tubes, please make them the same size!
When working with your own colors-
play with the blend mode and/or opacity at your own discretion
Step 1
In your tube, find a light color for the foreground and a dark color for the background.
Gerrie's color choice:
Material Properties -
Set your Foreground color to color # d0c6b2 - Set your Background color to color
#43193d

Step 2
File - Open a new transparent image of this size: 1000 x 650 pixels
Step 3
Activate your main tube - AnaRidzi1454
Edit - Copy
Activate your work - Edit - Paste as new layer
Step 4
Effects - Plugins - MuRa's Meister - Copies - Wallpaper
use the settings below
The pattern of this filter can vary.

Step 5
Effects - Image Effects - Seamless Tiling - Default.
Step 6
Layers - Merge - Merge All ( flatten)
Step 7
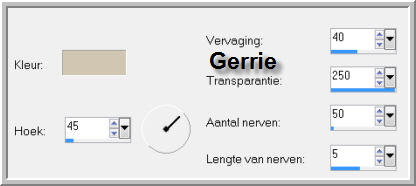
Effects - Texture Effects - Fine leather - Foreground color - d0c6b2S
use the settings below
Step 8
Layers - New raster layer
Step 9
Activate Flood Fill Tool -
 Flood fill the layer with the foreground color # b2919c.
Step 10
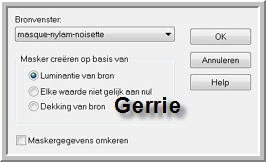
Layers - New mask layer - From image - Select - Masque-nylam-noisette
Step 11
Layers - Merge - Merge Group.
Step 12
Image - Mirror - Mirror vertical ( Image - Flip in older versions of PSP)
Step 13
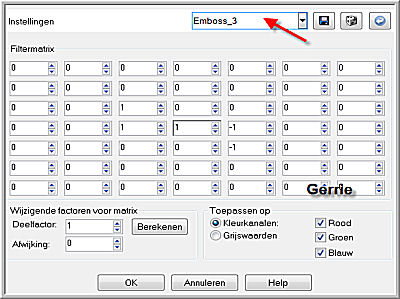
User Defined Filter - Emboss3
Step 14
Effects - 3D - Effects - Drop shadow.
Horizontal and Vertical at 0 - Opacity at 70 - Blur at 60 - Color black.
Step 15
Layers-Properties-Change the blend mode of this layer to Hard Light
Step 16
Layers - New raster layer .
Step 17
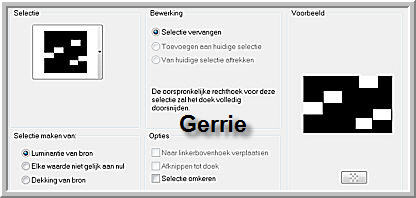
Selections –load/save selection –load selection from disc and select my selection:- Ger sel 23- OK
Step 18
Activate the background image - JHanna_123 background
Edit - Copy
Step 19
Activate your work - Edit - Paste into Selection
Step 20
Selections - Modify - Select Selection Borders- Both side - Border width 4

Step 21
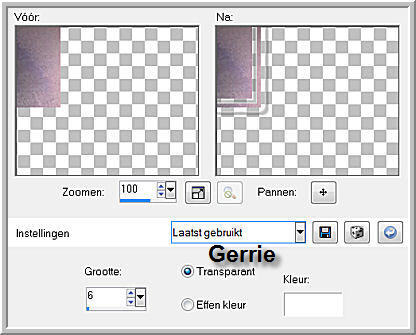
Effects - 3D - Effects - Chisel use the settings below
Step 22
Selections - Select none
Step 23
Effects - Image Effects - Seamless Tiling - Default
Step 24
Layers - Properties - Change the blend mode of this layer to Screen
Step 25
Effects - Plugins - MuRa's Meister - Perspective Tiling - use the settings below

Step 26
Layers - Duplicate
Step 27
Layers - Merge - Merge Down
Step 28
Effects - 3D - Effects - Drop Shadow- Settings are still correct.
Step 29
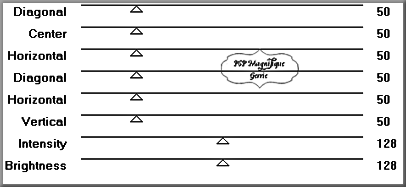
Effects - Plugins -
Greg's Factory Output Vol.II - Poolshadow -
use the settings below
Step 30
Activate the tube - Prisma_MistedByGini
Edit - Copy
Activate your work - Edit - Paste as new layer
Step 31
Move the tube in the upper left corner (see finished image)
Step 32
Layers - Properties - Change the blend mode of this layer to Luminance ( legacy)
Step 33
Activate the tube - caro3067
Edit - Copy
Activate your work - Edit - Paste as new layer
Step 34
Image - Resize by 130% - Resize all layers not checked
Step 35
Move the tube in the upper left corner (see finished image)
Step 36
Layers - Properties - Reduce the opacity of this layer to 38%.
Note: When working with your own colors-
play with the blend mode and/or opacity at your own discretion
Step 37
Activate your tube of a person - AnaRidzi1454
Edit - Copy
Activate your work - Edit - Paste as new layer
Step 38
Image - Resize by 95 % - Resize all layers not checked
Step 39
Drop Shadow of your choice
Step 40
Activate the tube - MMC_Bi270711_CG_02o
Edit - Copy
Activate your work - Edit - Paste as new layer
*
Step 41
Layers - Properties - Reduce the opacity of this layer to 30%
Play with the opacity of the layer
Step 42
Activate Raster 1 in the layer palette
*
Activate the tube - Vlinders
Edit - Copy
Activate your work - Edit - Paste as new layer
Step 43
Place at bottom left - (See finished image)
Step 44
Layers - Merge - Merge All (flatten)
Step 45
Selections - Select All
Step 46
Image - Add borders - Symmetric checked - 15 pixels -Color # b2919c
Step 47
Effects - 3D - Effects - Drop shadow.
Horizontal and Vertical at 4 -Opacity at 100 - Blur at 40 - Background color - # 43193d.
Edit - Repeat - Drop shadow
Step 48
Selections - Select none
Step 49
Image - Add borders - Symmetric checked- 50 pixels - Color # b2919c
Step 50
Activate your Magic Wand - Tolerance and Feather at 0 - Select the border with the 50 pixels
Step 51
Effects - Plugins -
Greg's Factory Output Vol.II - Poolshadow - same settings
Step 52
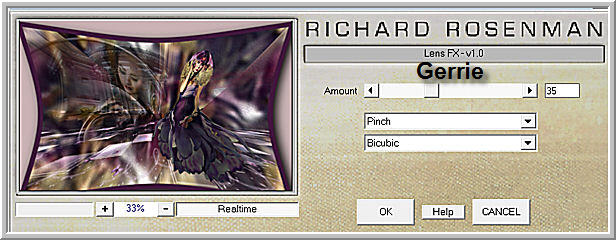
Effects - Plugins - Richard Roseman - LensFX -use the settings below
Step 53
Selections - Select none
Step 56
Activate your tube ( deco)- pspmagnifique Gerrie
Edit - Copy
*
Activate your work - Edit - Paste as new layer
do not move, it is in the right place
Step 57
Effects - 3D - Effects - Drop shadow.
Horizontal and Vertical at 10 - Opacity at 100 - Blur at 20 - Background color -# 43193d.
Step 57
Layers - Properties - Change the blend mode of this layer to Multiply
Step 58
Activate the tube - Viool
Edit - Copy
*
Activate your work - Edit - Paste as new layer
Step 59
Put it on the left side (see finished image)
Step 60
Image - Mirror - Mirror Horizontal (Image - Mirror in older versions of PSP)
Step 61
Activate the text - WordArt Magnifique Gerrie
Edit - Copy
Activate your work - Edit - Paste as new layer
Step 62
Put the text in place of your choice
Step 63
Drop Shadow by choice
Step 64
Layers - New Raster Layer- Add your watermark
Step 65
Image - Add borders - Symmetric checked - 1 pixel - Background color # 43193d
Step 66
For the Gallery
Image - Resize to 800 pixels - Resize all layers checked.
Step 67
File - Export - JPG - Give a name and save your image.
Have you created a lesson and want to share it?
Send me an email to pspmagnifique@gmail.com
Please do not use images larger than 800 px
****
***
Additional Example

Thank you for your beautiful versions!
Your submitted lesson creation will be displayed below.
This lesson was written by Gerrie on Aug. 1, 2013
This lesson is and remains the property of Gerrie.
It is forbidden to copy or distribute it without my written permission.
All my lessons are my own .... so any similarity is purely coincidental.
All my lessons are registered with TWI
proud member

Tag Index Home